
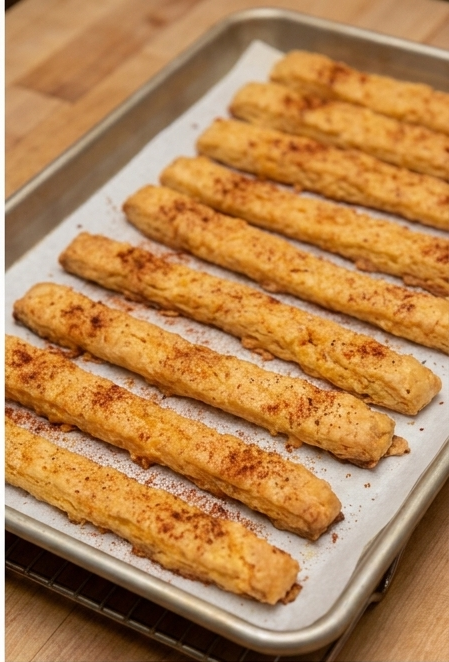
There’s something truly special about Southern Cheese Straws. These crisp, buttery little snacks are loaded with sharp cheddar flavor and have that old-fashioned homemade charm that makes them perfect for holiday gatherings, afternoon get-togethers, or casual parties.
Made with a handful of simple ingredients, including cheddar cheese, butter, flour, and a few seasonings, these savory treats are surprisingly easy to prepare. Once baked, they develop lightly golden edges and a delicate, crumbly texture that makes every bite delicious.
One of the best things about cheese straws is how easily they fit into different occasions. Serve them with a warm bowl of soup, arrange them on an appetizer platter, or simply enjoy them as a quick snack throughout the day. If you love homemade savory treats with plenty of cheesy goodness, this Southern favorite is definitely worth trying.
What Are Southern Cheese Straws?
Southern cheese straws are traditional savory crackers made with sharp cheddar cheese, butter, flour, and seasonings. The dough is shaped into thin strips, either by rolling and cutting or using a cookie press, then baked until crisp and lightly golden.
Their texture falls somewhere between a homemade cracker and a buttery biscuit. They’re crunchy enough to snap, yet tender and crumbly with a rich cheese flavor in every bite.
Sharp cheddar is the classic choice because its bold taste really shines after baking. However, you can also experiment with other cheeses to create different flavor combinations.
Ingredients You’ll Need
- Sharp cheddar cheese: Freshly grated cheddar provides the rich, recognizable flavor that makes cheese straws so delicious.
- Unsalted butter: Softened butter adds richness and gives the dough its tender, crumbly texture.
- All-purpose flour: Helps hold everything together and creates the structure of the straws.
- Cayenne pepper: Adds a gentle touch of heat without overpowering the cheese.
- Paprika: Provides a mild warmth and enhances the color.
- Salt: Brings all the flavors together and balances the richness of the butter and cheese.
For the best results, use butter that has softened naturally at room temperature. Avoid melting it, as this can affect the consistency of the dough.
How to Make Southern Cheese Straws
1. Prepare the Dough
Begin by placing the softened butter in a mixing bowl and beating it until creamy and smooth. Add the freshly shredded cheddar cheese and continue mixing until everything is well combined.
Next, incorporate the flour, salt, paprika, and cayenne pepper. Mix until the ingredients come together into a firm, workable dough.
The mixture should hold together easily without feeling too dry or crumbly. A stand mixer fitted with a paddle attachment makes this process especially simple.
2. Chill the Dough
Gather the dough and shape it into a disc or log. Wrap it tightly in plastic wrap and place it in the refrigerator for approximately 30 minutes.
This resting time helps firm up the butter, making the dough easier to roll and shape. It also helps the cheese straws keep their form while baking.
3. Shape the Cheese Straws
Preheat your oven to 350°F (175°C) and prepare your baking sheets by lining them with parchment paper.
Place the chilled dough on a lightly floured surface and roll it into a thin rectangle. Using a sharp knife or pastry cutter, slice the dough into narrow strips.
For a more traditional appearance, you can use a cookie press fitted with a star-shaped attachment to create beautifully ridged cheese straws.
Transfer the strips to your prepared baking sheets, making sure to leave a little room between each piece.
4. Bake Until Golden
Place the baking sheets in the preheated oven and bake for approximately 12–15 minutes, or until the edges turn lightly golden.
Keep an eye on them during the final few minutes. Because the strips are thin, they can brown quickly, and you want them crisp without becoming too dark.
5. Cool Before Serving
Remove the baking sheets from the oven and allow the cheese straws to rest for a few minutes.
Carefully transfer them to a wire cooling rack and let them cool completely. They may seem slightly soft straight out of the oven, but they’ll develop their signature crisp texture as they cool.
Tips for Making the Best Cheese Straws
Grate your own cheese. Freshly shredded cheddar blends more naturally into the dough. Pre-shredded varieties often contain added starches that can affect the final texture.
Keep the strips thin. Narrow, evenly cut strips bake more consistently and produce that classic crunchy texture.
Don’t skip chilling. If the dough feels sticky or difficult to handle, give it some extra time in the refrigerator.
Avoid overbaking. Look for lightly golden edges rather than a deep brown color. This helps preserve the buttery cheese flavor.
Allow enough cooling time. Cheese straws become firmer and crispier as they reach room temperature, so resist the temptation to move them too soon.
Easy Variations
Make Them Spicier
If you enjoy a little extra heat, increase the cayenne pepper or mix in a pinch of crushed red pepper flakes. This gives the cheese straws a slightly bolder flavor.
Experiment With Different Cheeses
Although sharp cheddar is the traditional favorite, other cheeses can add an interesting twist. Try Parmesan for a saltier flavor, pepper Jack for extra spice, or combine different cheeses for a more complex taste.
Add Fresh or Dried Herbs
For an aromatic variation, incorporate a little dried rosemary, thyme, or Italian seasoning into the dough. These herbs complement the cheddar beautifully and give the straws a different savory flavor.
How to Serve Southern Cheese Straws
These homemade cheese snacks are delicious straight from the cooling rack, but they’re also wonderful when served as part of an appetizer spread.
Here are a few serving ideas:
- Pair them with homemade soups, stews, or chili.
- Serve alongside fresh salads for a crunchy addition.
- Add them to a cheese and cracker board.
- Enjoy them with creamy dips and savory spreads.
- Include them on holiday appetizer platters.
- Serve them at parties with your favorite refreshments.
Their crisp, buttery texture makes them especially delicious alongside creamy soups and dips.
How to Store Cheese Straws
Allow the cheese straws to cool completely before transferring them to an airtight container. Store them at room temperature, keeping the lid tightly sealed to help maintain their crunch.
If they lose a little crispness after sitting for a while, place them in a warm oven for a few minutes to refresh their texture. Let them cool again before serving.
Frequently Asked Questions
Can I make cheese straws ahead of time?
Absolutely! You can prepare the dough in advance, wrap it securely, and keep it refrigerated until you’re ready to shape and bake. This is particularly helpful when preparing snacks for holidays, parties, or family gatherings.
Why did my cheese straws spread?
One common reason is that the dough was too warm before baking. The softened butter can cause the strips to lose their shape in the oven. Refrigerating the dough before shaping and keeping the prepared strips cool until baking can help prevent this.
Can I freeze cheese straws?
Yes! You can freeze the unbaked dough for later. Wrap it tightly in plastic wrap and place it in a freezer-safe bag or container. When you’re ready to use it, thaw the dough in the refrigerator before rolling, cutting, and baking.
How thin should cheese straws be?
For the traditional crisp texture, roll the dough fairly thin and cut it into narrow strips. If you prefer a softer, more biscuit-like bite, you can make them slightly thicker, but remember that thicker pieces may require additional baking time.
A Southern Classic Worth Making
Southern Cheese Straws are a wonderful reminder that simple ingredients can create some of the most memorable homemade snacks. With sharp cheddar, rich butter, and a little seasoning, these golden treats deliver plenty of flavor in every crunchy bite.
Whether you’re preparing them for a holiday celebration, sharing them with friends, or keeping a batch around for everyday snacking, they’re always a welcome addition to the table.
Make a batch and serve them fresh, and you’ll quickly understand why this timeless Southern favorite has remained so popular for generations!