
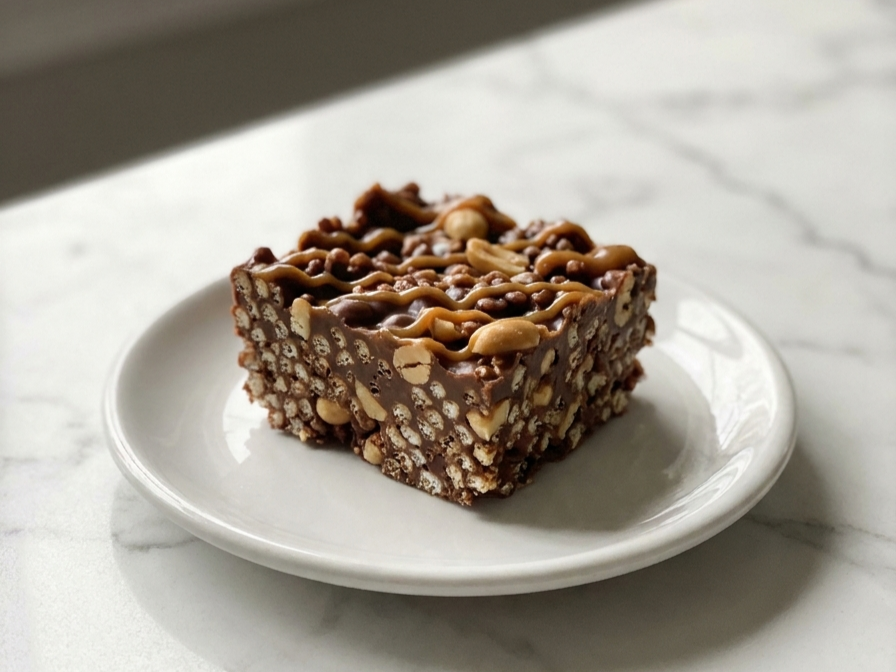
If you’re a fan of creamy chocolate paired with crispy cereal, these Homemade Crunch Bars are a simple dessert you’ll want to make again. They have a delicious chocolate flavor, plenty of crunch, and a firm consistency that makes them easy to cut into individual bars.
What makes this recipe even better is that it requires just three basic ingredients and absolutely no baking. Simply melt the chocolate, mix in the crispy rice cereal, spread the mixture into a pan, and let the refrigerator take care of the rest.
They’re wonderful for an afternoon snack, a homemade dessert platter, or a quick chocolate treat to enjoy and share with friends and family.
Why You’ll Love These Homemade Crunch Bars
- Just three ingredients: All you need is chocolate chips, crispy rice cereal, and a little coconut oil.
- No oven needed: These bars set in the refrigerator, making preparation incredibly simple.
- Ready with minimal effort: The chocolate mixture takes only a few minutes to prepare.
- Easy to personalize: You can add peanut butter, chopped nuts, or a touch of sea salt.
- Perfect for preparing ahead: Make them in advance and keep them refrigerated until serving time.
Ingredients You’ll Need
<text color=”secondary” size=”sm”>Makes approximately 12–16 bars · Preparation: 10 minutes · Chilling: 1–2 hours</text>
- 2 cups milk chocolate chips: These create the sweet, rich chocolate base. Chopped milk chocolate can also be used.
- 2 cups crispy rice cereal: Provides the signature airy crunch in every bite.
- 1 tablespoon coconut oil: Helps the chocolate melt smoothly and gives the finished bars a slightly softer consistency. You can leave it out if you prefer.
How to Make Homemade Crunch Bars
Step 1: Prepare Your Pan
Take an 8-inch square baking pan and line it with parchment paper. Leave some extra parchment hanging over the edges so you can easily remove the chocolate mixture once it has hardened.
Set the prepared pan aside while you work on the chocolate.
Step 2: Melt the Chocolate
Add the milk chocolate chips and coconut oil to a microwave-safe bowl.
Microwave in 20–30-second intervals, stirring well after each interval until the chocolate becomes completely smooth and melted.
Avoid heating the chocolate for too long. Excessive heat can make it thick, grainy, or difficult to work with.
If you prefer, you can melt everything using a double boiler. Place the chocolate and coconut oil in a heatproof bowl over a saucepan of gently simmering water. Make sure the bottom of the bowl doesn’t come into contact with the water.
Step 3: Add the Crispy Rice Cereal
Once the chocolate is melted, add the crispy rice cereal to the bowl.
Using a spatula, gently fold the cereal into the chocolate until all the pieces are evenly covered.
Be gentle while mixing so you don’t crush the cereal. Keeping the pieces intact is what gives these bars their wonderfully light and crunchy texture.
Step 4: Transfer to the Pan
Pour the chocolate and cereal mixture into your parchment-lined baking pan.
Use a spatula to spread everything into an even layer, gently pushing the mixture toward the corners.
Try not to press it down too firmly, as compressing the cereal too much can make the finished bars dense.
Smooth the surface so the mixture has a consistent thickness throughout.
Step 5: Chill Until Firm
Transfer the pan to the refrigerator and leave it there for approximately 1–2 hours, or until the chocolate has fully hardened.
The mixture should feel firm when gently pressed and should separate easily from the parchment paper.
Step 6: Slice Into Bars
Once the chocolate has set, use the parchment paper overhang to lift the entire mixture out of the pan.
Place it on a cutting board and slice it into squares or rectangular bars with a sharp knife.
If the chocolate slab feels extremely firm, let it rest at room temperature for a few minutes before cutting. Wipe the knife between slices if chocolate starts collecting on the blade.
Tips for Perfect Homemade Crunch Bars
A few small details can make a big difference when preparing these chocolate bars.
- Choose good-quality chocolate: Since chocolate is the main flavor, using chocolate you enjoy eating makes a noticeable difference.
- Melt the chocolate slowly: Gentle heating and frequent stirring help prevent the chocolate from scorching.
- Avoid contact with water: Even a tiny amount of water can cause melted chocolate to seize and turn grainy.
- Mix gently: Folding the cereal into the chocolate rather than stirring aggressively helps keep the pieces crispy and intact.
- Create an even layer: Spreading the mixture evenly makes the finished bars more consistent and easier to slice.
- Don’t press too hard: Apply just enough pressure to hold the ingredients together without crushing the cereal.
- Allow enough chilling time: Make sure the chocolate is completely firm before cutting, otherwise the bars may crumble or fall apart.
Easy Variations to Try
The original recipe is delicious as written, but you can easily experiment with different flavors and toppings.
Dark Chocolate Crunch Bars
Swap the milk chocolate for dark chocolate if you prefer a richer cocoa flavor and a dessert that’s less sweet.
Peanut Butter Crunch Bars
Before adding the cereal, mix 2–3 tablespoons of smooth peanut butter into the melted chocolate. It gives the bars a richer texture and a delicious nutty flavor.
Chocolate Almond Crunch Bars
Mix in a small handful of finely chopped toasted almonds. They’ll add another layer of crunch along with a pleasant nutty taste.
White Chocolate Crunch Bars
For a sweeter version, replace the milk chocolate with white chocolate. Since white chocolate is more sensitive to heat, melt it slowly and stir it frequently.
Salted Chocolate Crunch Bars
Before placing the pan in the refrigerator, sprinkle a little flaky sea salt over the chocolate mixture. It creates a lovely contrast with the sweetness.
Holiday Crunch Bars
Make these bars more festive by adding colorful sprinkles or finely crushed peppermint candies before the chocolate sets. They’re a fun option for holiday gatherings and dessert platters.
How to Store Homemade Crunch Bars
Storing your chocolate bars properly helps maintain their firm texture and keeps the cereal crunchy.
- Room temperature: In a cool kitchen, keep the bars in an airtight container in a dry location for several days. Avoid warm or humid areas because the chocolate may soften.
- Refrigerator: Store in an airtight container for up to two weeks. Place parchment paper between layers to prevent them from sticking together.
- Freezer: For the best quality, freeze the bars in a sealed, freezer-safe container for up to two months. Thaw them in the refrigerator before serving.
When serving bars straight from the refrigerator, let them sit at room temperature briefly. This gives the chocolate a slightly softer texture.
Frequently Asked Questions
Can I use puffed rice instead of crispy rice cereal?
Crispy rice cereal is the better choice because its light, crunchy texture works especially well in these bars. Regular puffed rice may be softer and less crisp, which means the finished dessert will have a different texture.
Why are my homemade crunch bars falling apart?
The mixture may not have enough chocolate to properly hold the cereal together, or it may not have been pressed gently enough into the pan. Make sure every piece of cereal is coated with chocolate and allow the mixture to chill completely before slicing.
Can I make these bars without coconut oil?
Yes! Coconut oil is optional. Its main purpose is to help the chocolate melt smoothly and create a slightly softer texture. You can leave it out, although the chocolate may become firmer once set.
Can I use chocolate bars instead of chocolate chips?
Absolutely. Simply chop your chocolate into small, evenly sized pieces so it melts more consistently.
Why did my chocolate become thick and grainy?
This usually happens when chocolate comes into contact with water or gets overheated. Make sure your bowl and utensils are completely dry, and melt the chocolate gradually rather than using too much heat at once.
Can I make these bars ahead of time?
Yes. These are great for preparing in advance. You can make them a day or two before serving and keep them in an airtight container until you’re ready to enjoy them.
A Homemade Chocolate Treat With Plenty of Crunch
These Homemade Crunch Bars show just how delicious a simple combination of ingredients can be. Smooth, rich chocolate mixed with crispy rice cereal creates a satisfying texture in every bite, and the no-bake preparation makes the whole process easy and convenient.
Whether you’re preparing a quick family snack, adding something homemade to a holiday dessert platter, or simply craving a chocolate treat, these bars are a fantastic choice.
Make a batch, keep it chilled in the refrigerator, and you’ll have a crunchy homemade chocolate snack ready whenever you want something sweet!