
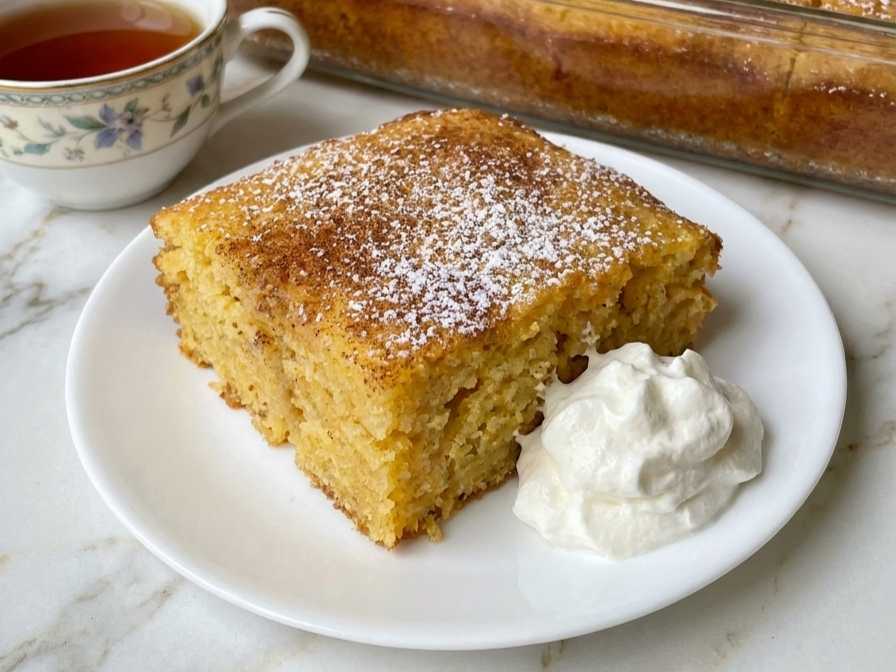
Some of the most loved family desserts are the ones that are simple, comforting, and made with ingredients you probably already have in your kitchen. Cuppa Cuppa Cake is a wonderful example of that kind of baking. This traditional-style dessert gets its name from its easy measuring method: a cup of one ingredient, a cup of another, and just a little mixing before it heads into the oven.
What comes out is a lovely rustic cake with a golden surface, a soft center, and a deliciously sweet, buttery flavor. Depending on the fruit you choose, you can add even more moisture and flavor, giving each version its own special touch.
One of the nicest things about Cuppa Cuppa Cake is that you don’t need advanced baking skills, fancy tools, or complicated decorating. It’s an easy homemade dessert for a weeknight treat, a family get-together, or a relaxing afternoon with coffee.
Why You’ll Love This Cuppa Cuppa Cake
- Easy measurements: The traditional cup-measuring method makes this recipe simple to remember and prepare.
- Common pantry ingredients: No unusual or specialty baking ingredients are needed.
- Very little preparation: Combine the ingredients, pour everything into a baking dish, and let the oven handle the rest.
- Classic homemade flavor: Its sweet, buttery taste makes it a comforting dessert for any day.
- Simple to customize: Change the fruit, add spices, or finish it with a topping to create a different variation.
Ingredients You’ll Need
Cuppa Cuppa Cake has several different versions, which means the ingredients aren’t always exactly the same. This particular recipe is a fruit-filled variation based on the familiar one-cup measuring concept.
- 1 cup self-rising flour
- 1 cup granulated sugar
- 1 cup milk
- ½ cup unsalted butter, melted
- 1 teaspoon vanilla extract
- 2 cups sliced peaches or other prepared fruit
When using canned peaches, make sure to drain them before adding them. Fresh peaches are another great option, especially when they’re ripe and juicy.
Note: This recipe follows the familiar cup-based idea, but it isn’t a strict three-ingredient version. Self-rising flour already includes leavening and salt, so don’t replace it with plain flour unless you also adjust the recipe.
How to Make Cuppa Cuppa Cake
Step 1: Prepare the Oven and Baking Dish
Start by preheating your oven to 350°F (175°C).
Lightly grease an 8-inch square baking dish with butter, or use an oven-safe dish of a similar size. Check that there’s enough room for both the batter and fruit so nothing spills over during baking.
Step 2: Mix the Dry Ingredients
Take a medium-sized mixing bowl and add the self-rising flour and granulated sugar.
Whisk the two ingredients together until evenly combined. This also helps break apart any lumps in the flour or sugar.
Step 3: Add the Milk and Vanilla
Pour the milk into the bowl with the dry ingredients, then add the vanilla extract.
Stir gently until you have a smooth batter. There’s no need to mix for too long; stop once the flour has been incorporated.
Step 4: Add the Melted Butter
Pour the melted butter into your prepared baking dish.
Next, carefully pour the batter over the butter. Depending on the version you’re making, some of the butter may move toward the edges or remain partly visible. As the cake bakes, it helps develop that rich, golden finish.
Step 5: Add the Fruit
Place the prepared peach slices over the batter.
Try to spread the fruit fairly evenly so that each piece of cake gets some fruit. Unless your particular recipe instructs otherwise, there’s no need to stir the fruit into the batter.
Step 6: Bake Until Golden
Transfer the baking dish to your preheated oven and bake for approximately 35–45 minutes.
Look for a golden top, bubbling edges, and a toothpick inserted into a portion of the cake that comes out without wet batter.
The exact baking time may change depending on how much moisture is in your fruit. If the middle still appears wet, leave the cake in the oven a little longer and check again.
Step 7: Cool and Serve
Take the finished cake out of the oven and let it rest for at least 15–20 minutes.
This short cooling period gives the fruit filling and cake time to settle and become easier to serve. Enjoy it warm or allow it to reach room temperature before slicing.
Tips for a Delicious Cuppa Cuppa Cake
A few simple baking tips can help you get a better result every time.
Measure consistently. Although the cup-based method is easy to remember, accurate measurements are still important. Use the same measuring cup for the flour, sugar, and milk.
Drain canned fruit thoroughly. Too much liquid from the fruit can leave the middle of the cake overly soft or make it difficult to bake completely.
Mix the batter gently. Stir only until the ingredients come together. Overmixing can affect the tenderness of the finished cake.
Choose an appropriately sized baking dish. A dish that’s too small may overflow, while one that’s much too large can spread the batter too thin and change the baking time.
Check the middle before taking it out. The edges may look perfectly baked before the center is ready, especially when the cake contains juicy fruit.
Easy Cuppa Cuppa Cake Variations
One of the reasons this dessert is so enjoyable is that you can easily adjust it with different fruits and flavors.
Peach Cuppa Cuppa Cake
Peaches are a wonderful choice for this fruit-filled dessert. You can use fresh, canned, or frozen peaches. If you’re using frozen peaches, thaw and drain them first to prevent excess moisture from getting into the batter.
Apple Cinnamon Cake
Replace the peaches with peeled, thinly sliced apples. Mix ½ teaspoon ground cinnamon into the flour and sugar to give the cake a warm, familiar apple-cinnamon flavor.
Berry Cuppa Cuppa Cake
For a fruity variation, try blueberries, raspberries, or blackberries. Fresh berries work well, but frozen berries can also be used once thawed and drained.
Pineapple Version
Well-drained pineapple chunks are a delicious way to give this cake a tropical twist. If the pineapple is particularly juicy, gently pat the pieces with a paper towel before adding them.
Add a Simple Topping
For an easy finishing touch, sprinkle a little powdered sugar over the cooled cake. You can also serve each slice with whipped cream or a scoop of vanilla ice cream.
What to Serve With Cuppa Cuppa Cake
This cake is lovely all by itself, but adding a simple topping or side can make dessert feel a little more special.
Here are some ideas:
- Vanilla ice cream
- Freshly whipped cream
- A spoonful of Greek yogurt
- Fresh berries or sliced peaches
- A light sprinkle of powdered sugar
- Coffee, tea, or cold milk
If you’re serving it warm, try placing a scoop of vanilla ice cream on top of a freshly cut slice. The combination of warm cake and cold ice cream is especially delicious.
How to Store Leftovers
Let the cake cool completely before covering or storing it.
Since this version contains fruit and milk, leftover portions should be kept in the refrigerator inside an airtight container. For the best quality, enjoy them within 3–4 days.
When you’re ready for another serving, warm an individual piece in the microwave for approximately 15–20 seconds. Add a little more time if necessary. Larger portions can also be reheated in a covered, oven-safe dish at 300°F (150°C).
If you’d like to freeze the cake, cut it into individual portions and place them in freezer-safe containers. When you want to enjoy it again, thaw overnight in the refrigerator before reheating. Keep in mind that freezing may soften the texture, particularly around the fruit.
Frequently Asked Questions
Why is it called Cuppa Cuppa Cake?
The name comes from the simple cup-based measuring style used in traditional versions of this dessert. Instead of carefully weighing every ingredient, the idea is to measure several basic ingredients using a cup.
Can I use all-purpose flour instead of self-rising flour?
Yes, but you’ll need to include an appropriate amount of baking powder and salt. Self-rising flour already contains both, so replacing it with regular flour without making adjustments can affect how the cake rises.
Can I make Cuppa Cuppa Cake without fruit?
Yes! The fruit can be left out, although the flavor and texture of the finished cake will be different. A version without fruit may also finish baking sooner, so start checking it earlier.
Can I use frozen fruit?
Absolutely. Just thaw the fruit first and remove any excess liquid before adding it to the cake. Extra moisture can make the center take longer to bake.
Is Cuppa Cuppa Cake supposed to be moist?
Fruit-filled versions of this cake are naturally softer and moister than traditional layer cakes. However, the center should still be baked through and shouldn’t contain raw batter. Letting it rest after baking also helps the cake set.
Can I prepare it ahead of time?
Yes. You can bake the cake a day in advance and refrigerate it after it has cooled completely. Warm individual servings gently before enjoying, or serve them chilled if that’s your preference.
A Simple Old-Fashioned Dessert Worth Remembering
Cuppa Cuppa Cake is a lovely example of how a homemade dessert doesn’t need to be complicated to taste wonderful. Its easy measuring method, everyday ingredients, and comforting fruit-filled flavor make it a great recipe to keep around for everyday baking.
Whether you make it with peaches, apples, berries, or another fruit you enjoy, this rustic cake is easy to adapt and perfect for sharing. Serve it warm with a little whipped cream or vanilla ice cream, and you’ve got a delicious homemade treat without spending hours in the kitchen.