
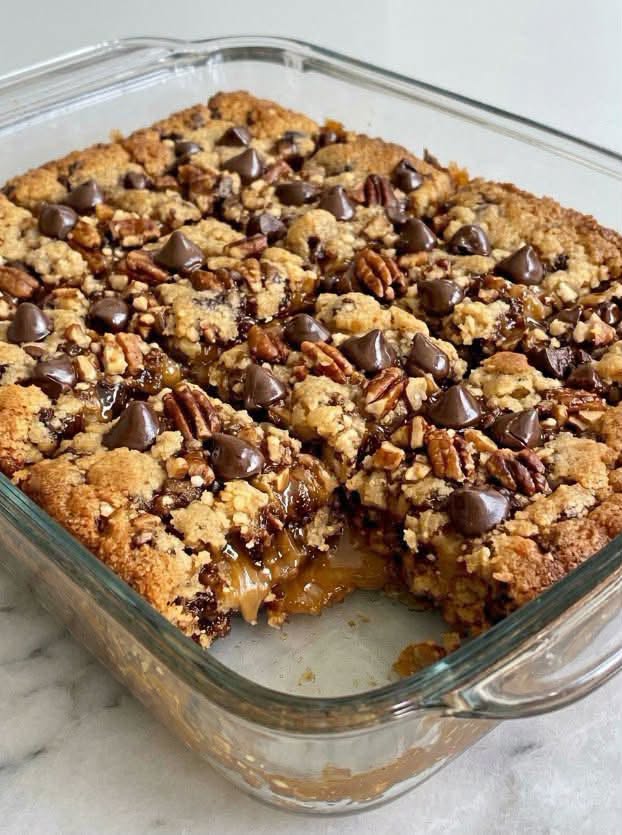
🍫🍯 AUNT PATTY MADE THESE 4-INGREDIENT TREATS FOR THE FAMILY PICNIC… AND MY COUSINS NEARLY FOUGHT OVER THE LAST SQUARE! 😂❤️
Every family has that one person who brings the dish everyone secretly hopes will be there.
For our family, it was Aunt Patty.
She didn’t arrive at the picnic with anything fancy.
No complicated layers.
No dozen-step recipe.
Just a simple pan of 4-ingredient treats cut into neat little squares.
And somehow…
By the end of the afternoon, those squares had become the most important thing on the picnic table. 😂
🌷 Please keep reading to discover how to make these easy little treats. We hope you enjoy the full recipe! ❤️✨
There’s something special about a dessert that doesn’t need a special occasion. These easy chocolate peanut butter cereal squares have that perfect combination of crunchy, chewy, sweet, and chocolatey. They’re made with just four everyday ingredients, require no baking, and come together in minutes.
They’re just the kind of old-fashioned, no-fuss treat that belongs at family picnics, potlucks, birthday parties, and holiday gatherings.
And trust me, you’ll want to cut them into plenty of squares. One batch has a funny way of disappearing!
Love easy desserts with just a few ingredients? Subscribe by email and get more simple, family-friendly recipes delivered straight to your inbox!
What Are Aunt Patty’s 4-Ingredient Picnic Treats?
These treats are simple no-bake chocolate peanut butter cereal squares made with crispy rice cereal, peanut butter, honey, and chocolate chips.
The peanut butter and honey create a sweet, sticky mixture that holds the cereal together, while melted chocolate forms a rich topping that makes every square feel like a little homemade candy bar.
Once chilled, the mixture becomes firm enough to slice into neat squares.
They’re crunchy, chewy, chocolatey, and wonderfully satisfying.
Best of all, you don’t need to turn on the oven. Just melt, stir, press, chill, and slice!
Why You’ll Love These 4-Ingredient Treats
There are so many reasons this little recipe deserves a place in your dessert collection.
Only four simple ingredients
You won’t need a long shopping list or specialty baking ingredients. Everything is easy to find at the grocery store.
No baking required
These treats set in the refrigerator, making them especially handy when the oven is already busy or the weather is too warm for baking.
Perfect for picnics and parties
Cut them into small squares and arrange them on a platter. They’re easy to pick up, easy to share, and just the right size for a sweet little bite.
A wonderful combination of textures
The crispy cereal gives every square a satisfying crunch, while the peanut butter mixture keeps the center slightly chewy.
Easy to prepare ahead
Make them the day before your gathering and keep them chilled until you’re ready to serve.
Kids and adults love them
They’re sweet, familiar, and chocolatey without being overly complicated.
Honestly, what’s not to love?
What Do These Picnic Treats Taste Like?
Imagine a homemade peanut butter candy bar with the crunch of crispy rice cereal and a smooth chocolate topping.
The honey adds a gentle sweetness and helps bind everything together. Peanut butter brings that rich, nutty flavor, while the cereal keeps the squares light and crispy.
Then there’s the chocolate!
It creates a smooth, slightly firm layer that contrasts beautifully with the crunchy center.
Each bite is sweet, salty, crispy, and chocolatey.
They’re simple, but definitely not boring!!
Ingredients You’ll Need
This recipe makes approximately 16–20 small squares, depending on how you cut them.</text>
3 cups crispy rice cereal – The crunchy base of the treats.
1 cup creamy peanut butter – Helps hold everything together and adds rich flavor.
1/2 cup honey – Provides sweetness and helps bind the cereal.
1 cup semi-sweet chocolate chips – Creates the delicious chocolate topping.
That’s it! Four ingredients and no complicated preparation.
A quick note about the peanut butter
Creamy, conventional peanut butter works best because it has a smooth consistency and helps the mixture hold together.
Natural peanut butter can work, but it should be thoroughly stirred first. If it’s particularly oily or runny, the squares may be softer and harder to slice.
Helpful Tools
You probably already have everything you need in your kitchen.
8-inch or 9-inch square baking pan
Parchment paper
Medium mixing bowl
Small saucepan or microwave-safe bowl
Rubber spatula
Measuring cups
Sharp knife
Small offset spatula or spoon
Lining the pan with parchment paper is especially helpful. Leave a little overhang on two sides so you can lift the chilled mixture out easily before cutting.
Ingredient Additions and Substitutions
Although the original version uses only four ingredients, you can make a few simple changes if needed.
Use a different nut butter
If you don’t have peanut butter, try:
Almond butter
Cashew butter
Sunflower seed butter
Soy nut butter
The consistency and flavor may vary, so choose a thick, smooth spread that can hold the cereal together.
Change the chocolate
Semi-sweet chocolate gives these squares a nice balance of sweetness, but you can also use:
Milk chocolate chips
Dark chocolate chips
Bittersweet chocolate
Dairy-free chocolate chips
Try a different sweetener
Maple syrup can replace honey, although the finished mixture may be softer and may need additional chilling. If you substitute it, add it gradually and check that the cereal mixture holds together before pressing it into the pan.
Add a little crunch
If you don’t mind adding an extra ingredient, try mixing in:
Chopped roasted peanuts
Toasted coconut
Mini pretzels
Chopped almonds
Sunflower seeds
Add a pinch of salt
A small pinch of flaky sea salt over the chocolate topping makes the peanut butter and chocolate flavors stand out beautifully.
How to Make Aunt Patty’s 4-Ingredient Picnic Treats
“homemade no bake chocolate peanut butter crispy rice cereal bars cut into neat squares chocolate topping” aspectRatio=”16:9″ width=”100%”/>
Step 1: Prepare the pan
Line an 8-inch or 9-inch square baking pan with parchment paper.
Leave some parchment hanging over the sides. This will make it much easier to lift the treats out once they’re firm.
Set the pan aside.
Step 2: Warm the peanut butter and honey
Add the peanut butter and honey to a small saucepan.
Warm over low heat, stirring constantly, until the mixture becomes smooth and easy to stir.
You don’t need to boil it. Just warm it enough to combine.
Alternatively, place the peanut butter and honey in a microwave-safe bowl and heat in short 15-second intervals, stirring between each one.
Step 3: Add the crispy rice cereal
Place the crispy rice cereal in a large mixing bowl.
Pour the warm peanut butter mixture over the cereal.
Use a spatula to gently fold everything together until the cereal is evenly coated.
Try not to crush the cereal too much. Those little crispy pieces are what give the squares their wonderful texture.
Step 4: Press the mixture into the pan
Transfer the cereal mixture into the prepared baking pan.
Spread it evenly, then press it down gently with the back of a spatula.
You want the mixture compact enough to hold together, but don’t press so hard that you crush all the cereal.
Pay attention to the corners so the squares have an even thickness.
Step 5: Melt the chocolate
Place the chocolate chips in a microwave-safe bowl.
Heat in 20-second intervals, stirring after each interval, until the chocolate is almost completely melted.
Continue stirring until smooth.
You can also melt the chocolate in a heatproof bowl set over a saucepan of gently simmering water. Make sure the bowl doesn’t touch the water.
Step 6: Add the chocolate topping
Pour the melted chocolate over the cereal mixture.
Use a spatula or the back of a spoon to spread it evenly from edge to edge.
If you’d like, gently tap the pan on the counter to help the chocolate settle into a smooth layer.
Step 7: Chill until firm
Place the pan in the refrigerator for about 1–2 hours, or until the chocolate topping and cereal mixture are firm enough to cut.
If you’re short on time, you can place the pan in the freezer for approximately 20–30 minutes, checking that the center has set.
Step 8: Slice into squares
Use the parchment overhang to lift the chilled slab from the pan.
Place it on a cutting board.
For cleaner slices, let it sit at room temperature for a few minutes before cutting with a sharp knife.
Cut into 16–20 squares, depending on the size you prefer.
And there they are!
A whole pan of crunchy, chocolatey treats made with just four ingredients.
What to Serve With These Picnic Treats
These squares are delicious on their own, but they also fit beautifully into a larger dessert spread.
Serve them with:
Fresh strawberries
Sliced bananas
Apple wedges
Grapes
Vanilla ice cream
Whipped cream
Fresh lemonade
Iced tea
Hot coffee
Cold milk
For a picnic, arrange them on a platter alongside cookies, brownies, fresh fruit, and other finger foods.
If you’re making a dessert table for a party, place each square in a small paper candy cup. It makes them look extra pretty and helps guests pick them up without getting chocolate on their fingers.
Tips for Making the Best No-Bake Chocolate Squares
A few little details can make these treats easier to prepare and slice.
Don’t overheat the peanut butter and honey
Warm them gently until smooth. Boiling the mixture can change its consistency and make the finished squares harder than expected.
Fold the cereal gently
You want to coat the cereal without crushing it. A light hand helps preserve that crispy texture.
Press the mixture evenly
If one side is thicker than the other, the squares won’t be as uniform. Spread the mixture carefully into the corners of the pan.
Don’t skip the chilling time
The refrigerator helps the chocolate topping firm up and allows the cereal mixture to hold its shape.
Let the slab rest before cutting
Chocolate straight from the refrigerator can be quite firm. A few minutes at room temperature can make slicing easier and help prevent the topping from cracking.
Use a warm knife for neat squares
Dip a sharp knife in warm water, wipe it dry, and make a cut. Repeat as needed.
This helps create cleaner edges.
Can You Make These Treats Ahead of Time?
Absolutely!
These are wonderful make-ahead treats, especially when you’re planning a picnic, school event, or family gathering.
Prepare the squares a day or two in advance, chill until firm, and store them in an airtight container in the refrigerator.
You can keep them in the pan and cut them just before serving, or slice them ahead of time and separate the layers with parchment paper.
Either way, you’ll have one less thing to worry about on the day of your gathering.
How to Store Aunt Patty’s Picnic Treats
Because these squares contain peanut butter and chocolate, refrigeration is a good option if your kitchen is warm.
Place them in an airtight container and store in the refrigerator for up to 1 week for the best texture and flavor.
Separate layers with parchment paper to prevent sticking.
For serving, let them sit at room temperature for about 5–10 minutes so the chocolate softens slightly.
Can You Freeze These 4-Ingredient Treats?
Yes!
Cut the chilled slab into squares and arrange them in a freezer-safe container with parchment paper between the layers.
Freeze for up to 2 months for the best quality.
When you’re ready to serve, thaw them in the refrigerator or allow them to soften briefly at room temperature.
Avoid leaving them in direct sunlight or a hot picnic area, as the chocolate topping can soften quickly.
Recipe Information
Prep time: 15 minutes
Chilling time: 1–2 hours
Total time: About 1 hour 15 minutes to 2 hours 15 minutes
Yield: 16–20 squares
Course: Dessert, snack
Cuisine: American-inspired
Main ingredients: Crispy rice cereal, peanut butter, honey, chocolate
Frequently Asked Questions
Can I use crunchy peanut butter?
Yes! Crunchy peanut butter works well and adds even more texture. The finished squares will have extra little peanut pieces throughout.
Why are my cereal squares falling apart?
The mixture may not have enough binding ingredients, or it may not have been pressed firmly enough into the pan.
Make sure the peanut butter and honey are thoroughly combined and that the cereal is evenly coated. Chill the mixture completely before slicing.
Why is my chocolate topping cracking?
Chocolate can become very firm when chilled. Let the treats rest at room temperature for a few minutes before cutting, and use a sharp knife warmed in water and wiped dry.
Can I use marshmallows instead of honey?
You can make a different version using melted marshmallows and butter, but that changes the recipe and its texture. For this particular four-ingredient version, honey helps bind the peanut butter and cereal.
Can I make these without chocolate?
Yes. Simply leave off the chocolate topping for a peanut butter cereal square. The treats will be softer and may need a little extra chilling time.
Can I use maple syrup instead of honey?
Yes, but maple syrup is thinner than honey, so the mixture may not hold together as firmly. Add it gradually and chill thoroughly.
Are these treats gluten-free?
Crispy rice cereal is not always gluten-free. Check the package carefully and choose a certified gluten-free cereal if needed. Also check the chocolate and other ingredient labels.
Can I make them nut-free?
Yes. Use sunflower seed butter or another suitable nut-free spread. Always check labels and avoid cross-contact if preparing them for someone with a nut allergy.
How do I keep them from getting too soft at a picnic?
Keep the squares chilled until shortly before serving. Pack them in a cooler with ice packs and keep them out of direct sunlight.
More Easy Desserts You’ll Love
If you enjoy simple treats that don’t require much effort, here are a few more recipes to try:
No-Bake Peanut Butter Pretzel Clusters – A crunchy, sweet-and-salty treat.
Chocolate Peanut Butter Balls – Creamy peanut butter centers covered in chocolate.
Homemade Crunch Bars – Crispy chocolate treats that are easy to make.
3-Ingredient Peanut Butter Blondies – Chewy, rich, and wonderfully simple.
Crockpot Christmas Crack – A festive candy recipe made for sharing.
2-Ingredient Pineapple Dessert Bars – An easy sweet treat with a fruity twist.
Leave a Review and Share Your Picnic Treats
Did you make Aunt Patty’s 4-Ingredient Picnic Treats?
I’d love to hear what you thought!
Leave a review and tell me whether you made the classic version or added your own twist. Did you use crunchy peanut butter? Sprinkle sea salt over the chocolate? Add a few chopped peanuts?
Share your ideas in the comments so other readers can try them, too.
And if you take a photo of your finished squares, save it to Pinterest and share it with your friends. These are the kinds of simple family treats that deserve to be passed along!
Approximate Nutrition Information
The following values are estimates for one square, assuming the recipe makes 20 squares. Actual nutrition will vary depending on the cereal, peanut butter, chocolate, and portion size.
Calories: 175
Protein: 4 g
Carbohydrates: 19 g
Fat: 10 g
Saturated fat: 3 g
Cholesterol: 2 mg
Sodium: 85 mg
Fiber: 2 g
Sugar: 12 g
These numbers are estimates and are provided for general informational purposes.
Final Thoughts
Some family recipes become traditions because they’re fancy. Others become traditions because they’re so easy and delicious that everyone asks for them again and again.
Aunt Patty’s 4-Ingredient Picnic Treats are definitely the second kind.
They’re crunchy, chewy, chocolatey, and wonderfully simple. You don’t need an oven, a mixer, or a complicated list of ingredients. Just four pantry staples and a little time in the refrigerator.Make them for a picnic, pack them for a school event, or keep a batch ready for those afternoons when everyone wants something sweet.And if your family starts sneaking squares before you serve dessert, don’t be surprised.You may find yourself doing exactly what Aunt Patty did…