
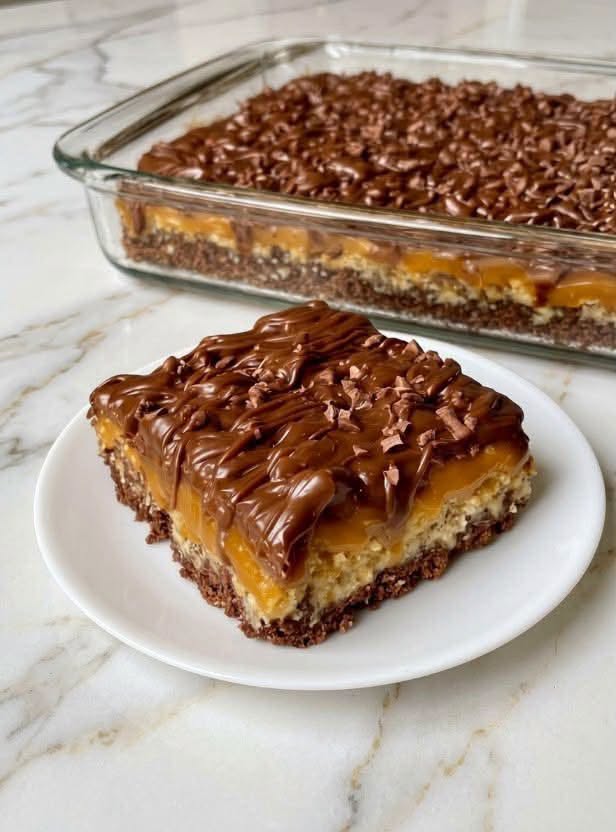
There is something wonderfully nostalgic about a treat that a grandmother felt she had to secretly stash away in the back of the refrigerator just to make sure everyone got a fair share. These no-bake chocolate walnut clusters are exactly that kind of recipe — rich, fudgy, studded with crunchy nuts, and dangerously easy to pull together with just a handful of pantry staples. No oven required, no fancy equipment needed, and no willpower strong enough to stop at just one.
Whether you are making them for a holiday dessert tray, a school bake sale, or simply because you deserve something indulgent on a quiet afternoon, these little chocolate mounds will quickly earn a permanent spot in your recipe rotation. And just like Grandma, you might want to make a double batch — because they have a way of disappearing faster than you can say “just one more.”
I love recipes like this because they remind us that a truly memorable homemade treat doesn’t have to be complicated. A bowl, a saucepan, a few simple ingredients, and a little time in the refrigerator are all you need.
Love easy, old-fashioned desserts? Subscribe by email and have more sweet family favorites delivered straight to your inbox!
What Are No-Bake Chocolate Walnut Clusters?
Chocolate walnut clusters are little mounds of melted chocolate mixed with crunchy walnuts and a few simple ingredients that help create a rich, fudgy bite.
Unlike traditional cookies, these treats don’t need to be rolled, shaped into perfect rounds, or baked in the oven. You simply melt the chocolate, stir in the walnuts, spoon the mixture onto a lined tray, and let the refrigerator do the rest.
This version uses semi-sweet chocolate, a little butter, vanilla, and a touch of maple syrup for extra flavor and a smooth finish. The walnuts add a lovely crunch that balances the sweetness of the chocolate.
They’re somewhere between homemade chocolate candy and a soft, fudgy cookie — and that’s exactly what makes them so irresistible!
Why You’ll Love These Chocolate Walnut Clusters
There are plenty of reasons to keep this recipe close, especially when the holidays roll around.
No oven required
When the kitchen is already busy with holiday cooking, it’s wonderful to have a dessert that doesn’t need oven space.
Just a handful of ingredients
You probably have most of what you need in your pantry already.
Rich, fudgy, and crunchy
The chocolate creates a smooth, indulgent base, while the walnuts add plenty of texture.
Perfect for sharing
Arrange them on a dessert platter, tuck them into treat boxes, or bring them to a potluck. They look lovely without requiring any decorating skills.
Easy to make ahead
These clusters need time to chill, which makes them perfect for preparing a day or two before a gathering.
Easy to customize
Use dark chocolate, milk chocolate, pecans, almonds, or even a little shredded coconut. There are so many ways to make them your own.
What Do Chocolate Walnut Clusters Taste Like?
Imagine a rich chocolate truffle meeting a crunchy homemade candy cluster.
The chocolate is smooth and deeply cocoa-flavored, with a soft, fudgy texture that melts in your mouth. The walnuts bring a pleasant earthy flavor and a satisfying crunch in every bite.
A little vanilla rounds everything out, while the tiny hint of maple syrup adds warmth without making the clusters taste like maple candy.
They’re sweet, but the walnuts keep them from feeling one-dimensional. And if you use dark or semi-sweet chocolate, you get that lovely balance of rich cocoa and nutty flavor.
Honestly, they’re the kind of treat you reach for when you want something small but seriously satisfying.
Ingredients You’ll Need
This recipe makes approximately 20–24 small clusters, depending on how large you scoop them.</text>
2 cups semi-sweet chocolate chips (about 340 g) – The main ingredient. Choose good-quality chocolate for the best flavor.
1 tablespoon unsalted butter – Helps create a smooth, glossy chocolate mixture.
1 tablespoon maple syrup or honey – Adds a little sweetness and depth.
1 teaspoon vanilla extract – Brings out the chocolate flavor.
1 1/2 cups chopped walnuts – Adds crunch and a delicious nutty taste.
Pinch of salt – Balances the sweetness and enhances the chocolate.
A note about the walnuts
Chopped walnuts work best because they distribute evenly throughout the chocolate.
If your walnuts are in large pieces, roughly chop them before measuring. You want a little bit of nut in every bite without making the clusters difficult to scoop.
For extra flavor, lightly toast the walnuts in a dry skillet over medium-low heat for 3–5 minutes, stirring frequently. Let them cool completely before adding them to the chocolate.
Helpful Tools
You don’t need anything fancy to make these clusters.
Medium heatproof mixing bowl
Small saucepan or microwave-safe bowl
Silicone spatula or wooden spoon
Baking sheet
Parchment paper or wax paper
Small cookie scoop or two teaspoons
Measuring cups and spoons
A small cookie scoop makes it easy to create evenly sized clusters, but two spoons work just as well.
Ingredient Additions and Substitutions
This recipe is wonderfully flexible, so feel free to use what you have.
Use a different chocolate
Semi-sweet chocolate gives these clusters a classic candy-like flavor, but you can also try:
Dark chocolate for a less sweet, richer taste
Milk chocolate for a sweeter, creamier cluster
Bittersweet chocolate for a deeper cocoa flavor
A mixture of dark and semi-sweet chocolate
If you use milk chocolate, you may prefer to skip the maple syrup or honey because it is already quite sweet.
Swap the walnuts
Not a walnut fan? No problem!
Try:
Chopped pecans
Almonds
Hazelnuts
Cashews
Pistachios
Roasted peanuts
Pecans are especially delicious if you want a softer, buttery nut flavor.
Add dried fruit
For a little chewy sweetness, stir in a small handful of:
Dried cranberries
Raisins
Chopped dried cherries
Chopped apricots
Keep the total amount of additions moderate so the chocolate can still hold everything together.
Add coconut
A few tablespoons of unsweetened shredded coconut give the clusters a lovely texture and a little tropical flavor.
Make them extra chocolatey
Stir in a tablespoon or two of mini chocolate chips after the melted chocolate has cooled slightly. They’ll add little pockets of chocolate throughout the clusters.
Add a little crunch
Crispy rice cereal or crushed pretzels can make these clusters even more interesting. Add them along with the walnuts, using a modest amount so the mixture still holds together.
How to Make Grandma’s No-Bake Chocolate Walnut Clusters
<AsyncImage query=”homemade chocolate walnut clusters on parchment paper rich dark chocolate chopped walnuts” aspectRatio=”16:9″ width=”100%”/>
Step 1: Prepare your baking sheet
Line a baking sheet with parchment paper or wax paper.
Make sure you have enough room in your refrigerator for the tray to sit flat. If necessary, use two smaller trays.
Step 2: Prepare the walnuts
Roughly chop the walnuts into small pieces.
If you’d like a deeper nutty flavor, toast them in a dry skillet over medium-low heat for 3–5 minutes, stirring often.
Once fragrant, transfer them to a plate and let them cool completely.
Don’t add warm walnuts to the melted chocolate, as they can affect how quickly the chocolate sets.
Step 3: Melt the chocolate
Place the chocolate chips and butter in a heatproof bowl.
You can melt them using either of these methods:
Microwave method: Heat in 20-second intervals, stirring well after each one. Continue until the chocolate is almost completely melted, then stir until smooth.
Double-boiler method: Place the bowl over a saucepan containing gently simmering water. Make sure the bottom of the bowl doesn’t touch the water. Stir until the chocolate and butter melt smoothly.
Be careful not to overheat the chocolate. Chocolate can become thick or grainy if it gets too hot.
Step 4: Add the flavorings
Stir the maple syrup or honey, vanilla extract, and pinch of salt into the melted chocolate.
Mix until smooth and evenly combined.
The mixture should look glossy and rich.
Step 5: Fold in the walnuts
Add the chopped walnuts to the chocolate mixture.
Use a spatula to fold everything together until the nuts are thoroughly coated.
You want plenty of walnuts in every spoonful, but there should still be enough chocolate to hold the clusters together.
Step 6: Scoop the clusters
Use a small cookie scoop or two teaspoons to drop portions of the mixture onto the prepared baking sheet.
Leave a little space between each cluster so they don’t touch.
Don’t worry about making them perfectly round. Their uneven, homemade shape is part of their charm!
Step 7: Chill until firm
Place the tray in the refrigerator for about 45–60 minutes, or until the chocolate has completely set.
If you’re in a hurry, you can place them in the freezer for approximately 15–20 minutes, checking that they become firm without being left there too long.
Step 8: Serve and enjoy
Once firm, gently lift the clusters from the parchment paper and arrange them on a serving plate.
For a pretty finish, you can drizzle a little melted white chocolate over the top or sprinkle on a tiny pinch of flaky sea salt before the chocolate sets.
And there you have it!
A batch of rich, crunchy, chocolatey treats with practically no effort.
What to Serve With Chocolate Walnut Clusters
These little treats are delicious on their own, but they’re also lovely as part of a dessert spread.
Try serving them with:
Fresh strawberries
Raspberries
Sliced pears
Vanilla ice cream
Whipped cream
Hot coffee
Cappuccino
Hot chocolate
A cup of tea
For a holiday dessert platter, arrange the clusters alongside shortbread cookies, peppermint bark, chocolate truffles, and dried fruit.
They also make a sweet addition to homemade gift boxes. Place each cluster in a small paper candy cup and arrange them in a decorative tin or box.
Tips for Making the Best Chocolate Walnut Clusters
A few small details will help your clusters turn out smooth, rich, and easy to handle.
Use good-quality chocolate
Chocolate is the star of this recipe, so choose a brand you enjoy eating on its own.
Good-quality chocolate chips or chopped baking chocolate will both work.
Keep water away from the chocolate
Even a small amount of water can cause melted chocolate to seize and become thick or grainy.
Make sure your bowl, spatula, and saucepan are completely dry.
Melt the chocolate slowly
Use low, gentle heat and stir frequently. It’s better to take an extra minute than to scorch the chocolate.
Let toasted walnuts cool
Warm nuts can soften the chocolate mixture and make it harder for the clusters to set evenly.
Don’t add too many mix-ins
It’s tempting to keep adding more nuts, dried fruit, and crunchy extras, but the chocolate needs to coat everything and hold the clusters together.
Make the clusters the same size
A small cookie scoop helps them chill evenly and makes serving easier.
Give them enough chilling time
If the centers still feel soft, return the tray to the refrigerator until they’re firm.
Can You Make Chocolate Walnut Clusters Ahead of Time?
Absolutely! These are ideal for preparing ahead, especially during the busy holiday season.
Make the clusters up to several days before your gathering, let them set completely, and store them in an airtight container in the refrigerator.
If you’re preparing them for a party, you can arrange them on a serving platter shortly before guests arrive.
They also make wonderful homemade gifts. Just keep them chilled until you’re ready to package or serve them.
How to Store No-Bake Chocolate Walnut Clusters
Because these clusters contain chocolate and butter, refrigeration is the easiest way to keep them firm.
Place them in an airtight container, separating layers with parchment paper so they don’t stick together.
Store in the refrigerator for up to 2 weeks.
For the best flavor and texture, let them sit at room temperature for about 5–10 minutes before serving. This takes away some of the chill and allows the chocolate to soften slightly.
Can You Freeze Chocolate Walnut Clusters?
Yes!
Arrange the fully set clusters in a freezer-safe container, separating the layers with parchment paper.
Freeze for up to 2 months for the best quality.
When you’re ready to enjoy them, transfer the container to the refrigerator and let the clusters thaw gradually. This helps reduce condensation on the chocolate.
Recipe Information
Prep time: 15 minutes
Chilling time: 45–60 minutes
Total time: About 1 hour
Yield: 20–24 clusters
Course: Dessert, candy, snack
Cuisine: American-inspired
Main ingredients: Chocolate, walnuts, butter, vanilla
Frequently Asked Questions
Can I use chopped chocolate bars instead of chocolate chips?
Yes. Finely chopped semi-sweet or dark chocolate bars work beautifully. They may melt a little differently from chocolate chips, so heat gently and stir often.
Why won’t my chocolate clusters set?
The chocolate may have been overheated, or the mixture may contain too much added liquid or butter. Make sure you measure carefully and chill the clusters until completely firm.
Can I make these without butter?
Yes. You can leave out the butter for a firmer chocolate cluster. The finished texture may be slightly less creamy, but the recipe will still work.
Can I use salted walnuts?
You can, but taste the mixture before adding the extra pinch of salt. Salted nuts may provide enough seasoning on their own.
Can I use honey instead of maple syrup?
Yes. Honey works as a substitute, although it has a slightly different flavor. Use the same amount and avoid adding extra liquid.
Are these clusters gluten-free?
The basic ingredient list is naturally gluten-free when you use chocolate and other ingredients labeled gluten-free. Always check packaging for possible cross-contact or added ingredients.
Can I make these nut-free?
You can replace the walnuts with crispy rice cereal, crushed pretzels, or toasted pumpkin seeds if seeds are suitable for your needs. For a nut allergy, check every ingredient label carefully and avoid cross-contact with nuts.
Why did my chocolate become thick and grainy?
Chocolate can seize when even a little water gets into it, or it can become scorched if overheated. Use completely dry equipment and melt the chocolate slowly.
Can I leave the clusters out at room temperature?
They can be served at room temperature for a short period, but they may soften in a warm kitchen. Keep them refrigerated until serving and return leftovers to the refrigerator.
Can I make larger clusters?
Of course! Use a larger scoop for generous dessert-sized portions. Just remember that larger clusters may need a little more chilling time.
More Easy Homemade Treats You’ll Love
If these chocolate walnut clusters disappear quickly at your house, here are a few more simple treats worth adding to your dessert list:
No-Bake Peanut Butter Pretzel Clusters – A sweet-and-salty combination with plenty of crunch.
Chocolate Peanut Butter Balls – Creamy peanut butter centers covered in chocolate.
Homemade Crunch Bars – Crispy, chocolatey treats that are easy to make at home.
Crockpot Christmas Crack – A sweet holiday candy that’s perfect for sharing.
Sticky Pecan Pie Cookies – Buttery cookies with a rich pecan pie-inspired topping.
Chocolate Peanut Butter Blondies – A chewy, fudgy dessert for chocolate and peanut butter lovers.
Leave a Review and Share Your Clusters
Did you make Grandma’s No-Bake Chocolate Walnut Clusters?I’d love to know how they turned out! Leave a review and tell me whether you kept them classic with walnuts or tried a different combination.Did you add dried cranberries, a little sea salt, or a drizzle of white chocolate? Share your favorite variation in the comments.And if you take a picture of your finished clusters, save it to Pinterest and share it with your fellow dessert lovers. These are exactly the kind of little homemade treats that deserve to be passed around!
Approximate Nutrition Information
The following values are estimates for one cluster, assuming the recipe makes 24 clusters. Actual nutrition will vary depending on the chocolate brand, walnut size, and optional additions.
Calories: 135
Protein: 2 g
Carbohydrates: 11 g
Fat: 10 g
Saturated fat: 4 g
Cholesterol: 3 mg
Sodium: 15 mg
Fiber: 1 g
Sugar: 9 g
These numbers are estimates and are provided for general informational purposes.
Final Thoughts
Some desserts are memorable because they’re elaborate. Others become family favorites because they’re so simple, so delicious, and so easy to make again.Grandma’s Secret No-Bake Chocolate Walnut Clusters are definitely in that second category.They’re rich, fudgy, crunchy, and wonderfully uncomplicated. You don’t need an oven, a mixer, or a long afternoon of baking. Just melt, stir, scoop, and chill.Make a batch for the holidays, tuck a few into a homemade gift box, or keep them in the refrigerator for those afternoons when you want a little something sweet.And if your family starts sneaking them before dessert is served, don’t say I didn’t warn you.